I recently began revising a gardening book I wrote many years ago, in order to prepare it for publication as an e-book for Kindle. It has been enlightening to read suggestions and ideas I had included, but had since forgotten.
One of my favorite ideas was about hardening off plants before setting them out. I had tried to follow the official guidelines, in order to harden off plants so they didn’t suffer too much transplant shock. I really did try. I knew I was supposed to take my baby plants outside, and set them in a sheltered spot, leaving them there for just a few minutes longer each day.
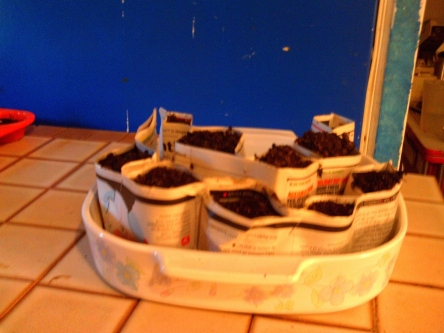
At the time I was starting dozens and dozens of plants inside. I had broccoli, cabbage, cauliflower and brussels sprouts; tomatoes, zucchini, crookneck, and patty pan; peppers of several varieties, both sweet and hot; flowers of more types than I could even begin to list. Taking them outside meant trip after trip after trip, with cake pans, egg cartons, and boxes full of seedlings in a variety of low-cost pots.
I usually did a decent job of it for the first couple of days. If we had a week of bad weather, which might damage delicate seedlings, it messed up the schedule. If I had a bad week, with unusually high levels of pain or fatigue, that caused problems too. I learned from experience, though, that seedlings planted outside without at least a little time to harden off would yellow and wither in the sunlight, wind, and fluctuating temperatures that tended to be ten to twenty degrees lower than the seedlings were used to in my house. I struggled with guilt and failure in equal measure.
We lived, at that time, in a double-wide mobile home. There were two sliding glass doors: one off the master bedroom, leading to a small deck, and another off the family room, leading to a larger deck. It took me a few years, but I found a solution that met the plants’ needs as well as my own. Because I started so many plants indoors, I got an inexpensive metal shelving unit, like people used in workshops and garages. I set my plants up on that. In the earliest stages, I attached growing lights to the bottom of two of the five shelves, and rotated the seedlings so all of them got a little time under the lights, during their early growing days. Then, as the weather improved in the spring, I began to harden them off the easiest way I could find.
I moved the shelving unit in front of the sliding glass doors, and opened the door. Because I kept the screen closed, my house was safe from cats, dogs, and flying things. When the door itself was open, though, the plants were exposed to sunlight, wind, and cooler temperatures in a way that was gentle and convenient. I could slide the door open, and an hour or two later, close it again. By planting time, I was leaving the door open most of the day, and occasionally even in the night—which gave the plants exposure to the darkness and cooler temperatures they would experience in night time gardens. If there was an unexpected frost, they were safe inside.
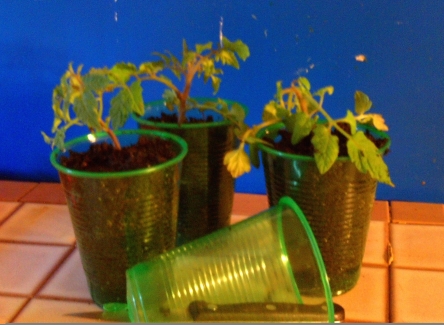
By the time all the danger of frost was past, my plants were ready to set out. Exposure to real sunlight, without the glass that filters out some kinds of light, meant they were not as fragile and leggy as they would have been. Not only did I have sturdy plants, but by planting time they had been toughened up, and had grown to decent, but manageable, size.
In later years, when I wasn’t trying to grow enough to feed my family without help from the grocery stores, I cut back on the number of plants I started. By then, I had no sliding glass doors, and I didn’t need them for the few plants I wanted to harden off. A windowsill or two was enough, and rust-proof bread pans, made of glass or aluminum, lined my window sills, filled with plants enjoying the sun and air the windows provided.

I had a few more tricks, though, many of which I re-learned as I edited my gardening book for upcoming publication. I knew that tomato plants needed a lot of warmth in the garden, and that wind was damaging for them, especially in the early days and weeks. There were plenty of things available in garden catalogs to protect them, but I learned that I could cut the bottom off my empty milk jugs and place them over tiny tomato plants to act as greenhouses. I took the lids off and threw them away, leaving the open top as a vent so the little greenhouses wouldn’t get too hot. By the time the tomatoes were too big for the milk jugs, the weather was warm enough to keep them happy.
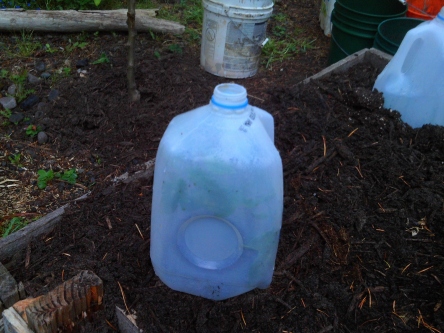
More milk jugs came into play after the little greenhouses came off. I saved the milk containers all year, and in the spring, when I set out tomato, pepper, and squash plants, I filled the milk jugs with water. Four water-filled milk jugs were set around each plant. I used the gallon size, rather than half gallons, because they were more stable, and less likely to fall over and crush the baby plant—a very real risk with less stable versions. The milk jugs protected the still-small plants from wind, and absorbed heat during the sunny days. That heat kept the baby plants warm on cooler days, or at night.
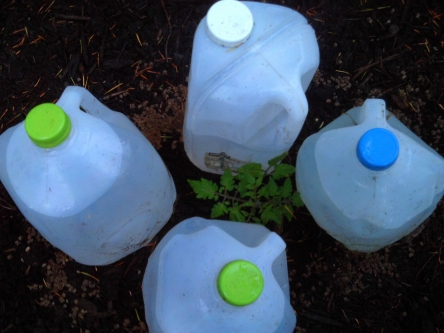
I left them in place the whole season, figuring that even if the difference was only a degree or two, the more warmth I could provide the plants, the better my crop would be. It seemed to work, and I often had tomatoes and squash before any of my neighbors. Milk jugs in the garden were never very attractive, but once the plants were large enough to begin blooming, the jugs were almost hidden.
I also re-learned a number of ways of marking rows. I had stopped using string, although it had at least reminded my children not to walk on the rows. As my children grew, that aspect of gardening became less important. On the contrary, with my MS-inspired clumsiness, I found strings in the garden hazardous, and either tripped and fell, or tangled my feet and pulled the strings out. It was frustrating, and unhelpful.
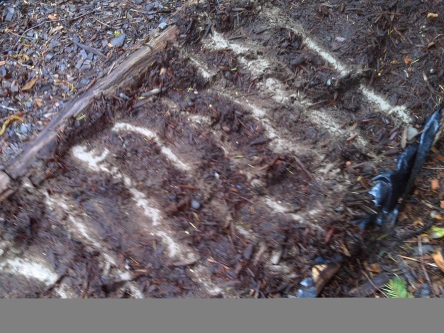
However, as I experimented with ways to space carrot seeds out enough to avoid thinning, I noticed a side benefit of mixing the seeds with sand. When I laid out the rows of sand-carrot mixture, I could see exactly where the carrot rows would be. In North Dakota, sudden thunder storms occasionally washed the sand away, and I knew not to look for carrots where I had planted them. Most of the time, though, the sand stayed in place, showing me clearly where to watch for seedlings—because I was one of those people who inspected the garden almost daily, anxious for the first view of growing things.
Once I had discovered how convenient it was to have rows so nicely marked, I began to experiment with other options,as well as using the technique on any crop with smallish seeds. Sand was fine—and especially fun when I found pink play sand on clearance. I had little pink stripes for carrots to grow in, which made me smile every time I looked at them. Once I retired, though, and moved back home to Western Washington, I had a garden that was mostly sand. Everyone did. With land so close to the ocean, high sand content was understandable, but I didn’t want to add sand under those circumstances. I actually wanted to add organic matter.
I considered the benefits of marking rows by planting small seeds in snow-white vermiculite. It seemed too artificial, somehow. I tried inexpensive potting soils, experimenting with one and then another, until I found one that was a lighter color than the soil in my garden. One type also had small white beads of water-retaining material. When I used those, either by mixing seeds into them and laying lines of potting mix in the garden, or by making small furrows for seeds, and filling the furrows with potting mix, I could easily see where my short, cross-bed rows were planted. I also felt better about adding that material to my garden than I did when I added sand. It wasn’t enough to make much difference, and I was already adding vast quantities of compost and manure, but a little potting mix made me feel better than a little sand had done.
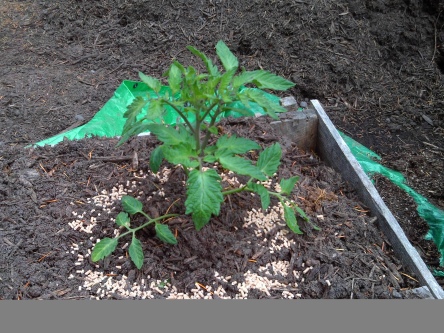
I took one final step when I planted things in my garden. Although for many years I tried to garden as organically as possible, slugs became such a problem that I began to use commercial slug poisons. I tried organic methods first, and continued to use some of those. They helped, but they just were not enough. Now, each growing plant gets a circle of slug killer, and each bed is outlined with it. I was not willing to let all of the work starting seeds, growing them in the house and on windowsills, and putting them in little greenhouses all their own be lost because our four-inch slugs wanted a snack. This was the one place I used commercial pesticides. I never regretted it. A garden left uneaten had a better chance of providing produce for my family.