I have always loved line-dried linens. There was something about the fresh-air smell, and the crispness of sheets and towels dried outside on a clothesline, that made me happy. Even if there were negative smells outside, the clothes I dried on the line smelled sweet and clean, and very little brought me more joy than going to bed in a fresh nightie and sheets, all dried outside on the line.
I even found a way to dry my clothes outside during North Dakota winters. I watched the weather forecast, and if it was going to be anywhere even close to above freezing, especially if sunshine and breezes were forecast, I washed a load or two of laundry before bed. In the morning, I got up early and hung those clothes outside. They were usually dry by the time I got home from work, and if they weren’t, ten minutes in the dryer was enough to chase away lingering damp.
For me, the end result was always worth the effort. It took longer to hang the clothes outside than throw them in the dryer. I had to wear a coat and hat, and even gloves, to hang out the laundry in the North Dakota winter. Quite aside from the pleasure I took in the scent and texture of those line-dried clothes, though, getting them dry was free! Environmental virtue and thriftiness added to my pleasure.
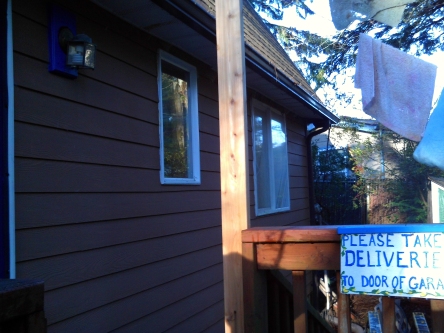
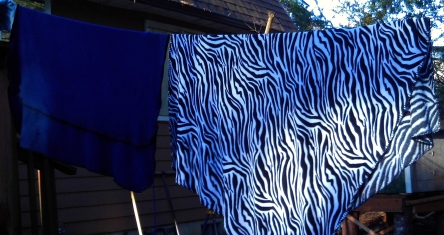
Those experiences led me, almost as soon as I moved into this house, to put up not one, but three clotheslines. A short, pulley-type clothesline began near the back door, and allowed my daughter to hang out a few things without going far from the house. A more standard style, using cross pieces and eye screws, provided five lines where she and her husband could hang laundry in the summertime. Behind the garage, another four-line set gave me a place for my own laundry, and got frequent use in the summer.
Then winter came. In Western Washington, winter means rain. I enjoyed the rain, and the milder temperatures, but I needed to find a way to dry my clothes without rain soaking them before they had time to dry.
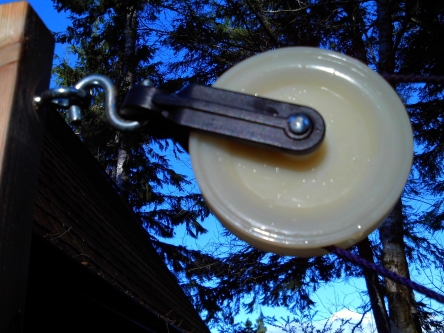
While shopping at Goodwill, my daughter and I came across an extendable clothesline kit. After some thought, we hung that in her bathroom, which was long and narrow and about the right length for the lines to fit well. Many people hang this type of clothesline outside, but that would not have solved our rain problem, so I drilled pilot holes, inserted plastic anchors for screws, and mounted the two parts of the set on opposite walls. One half held the coiled clotheslines. When they were pulled out using the handle provided, they could be stretched the length of the bathroom and attached to the other half of the set, which I had mounted on the opposite wall. My daughter was thrilled to have a place to hang clothing to dry in her bathroom. My own problem, however, remained.
It took me a couple of months to figure out what to do. I had divided the oversized one-car garage into three sections. In the half-width that extended beside the single bay, I created a work shop, building a workbench and adding shelves for fasteners and tools. That workshop gets a lot of use, and hanging clothes in there would expose them to too much sawdust.
After my recent knee surgery, I took over the front half of the vehicle bay and created a warm, cozy television room. It held a hide-a-bed couch, my recliner, side table, lamp, and television. I didn’t want to put a clothesline there because–well I just didn’t. That was where I was allowed to relax, watch television, and do some painting.
That left the odd little area at the back half of the vehicle bay. The stairs ran up along the back wall of the garage, with the bathroom tucked partially underneath. I had a large upright freezer in the space, as well as a refrigerator a departing neighbor gave us. A beam in the ceiling divided that space from the television room. It seemed like the cleanest, most convenient place for an indoor clothesline, but I still wasn’t sure how to go about it.
Finally, I had an epiphany. I realized that, since finding a stud in the walls of the garage (and bathroom) had proven to be almost impossible, I might be safest running my lines from the beam, across the space to the railings of the stairs. At first, I was worried about weakening a support beam, but closer inspection showed that what I had thought was a beam was actually just a 2 x 8. It was there for appearance, not structure, so attaching eye screws was not going to hurt it. I decided to run lines across the space, rather than lengthwise. Doing it that way allowed me leave room to access the freezer and refrigerator, and still have room for a half-dozen short lines.

One thing I learned a long time ago was that, even if I have drilled a pilot hole, I didn’t have the hand strength to sink an eye screw (or anything like it) into wood. I had to slide a screwdriver through the eye and use it to tighten the eye screw as much as possible. One by one, I got the eye screws up. Then I began to deal with the lines.
I started by installing an eye screw in the side of the beam about three feet away from the freezer. I thought that would allow enough room for access. Then I used my forearm as a measure (because I have not been able to find ANY of my tape measures lately!) and marked the space between the first line and the second. I figured, if Noah could use the forearm to measure cubits for his ark, I could use it to measure for a clothesline.
The first line I put up was wrong. I had tried to guess where to put the two ends, and ended up with a crooked line across the space. My balance has not been good since the surgery, for some reason, and that crooked line made me dizzy. It had to go. I took down the line and the eye screw and started over. The second time, I got it right, and things got easier.

I had hung insulating curtains across the side of the stairway, to keep the heat where I wanted it to be. I didn’t want to take the curtains down, and since they were only made of old sheets and quilt batts, I wasn’t worried about damaging them. I used sharp scissors to cut small holes where I needed to get through the curtains to attach eye screws to the stairway railings or uprights. That worked well. In one spot, there was no railing to attach to, because of the angle of the stairs. I drilled my pilot hole into the ceiling where I could tell there was a board I could attach the eye screw to. I drilled hard through the sheetrock ceiling, because I wanted to make sure to sink the eye screw into the wood, not just the sheetrock.

To keep the room functional, I had to set the lines high enough to be out of the way–not just for me, but for my tall son-in-law. At the same time, when the lines were high enough to be out of the way, they were very difficult for me to reach–because I am not tall. I thought about just using a stepladder or footstool to hang the laundry on the lines, but too much of that causes problems for my recovering knee. I needed to find a better way.

I tied the first section of line to the eye screw, and pulled it across the room so I could thread it through the corresponding eye screw on the other side of the room. Rather than tying each line off individually, I decided to install them in pairs. To do that, I took the line to the next closest eye screw. Only then did I re-cross the room. Rather than tying the line off, I ran it through the eye screw, and then down, so I could tie it to another eye screw I had set lower on the staircase, where it was within easy reach for a person my height.

I handled each pair of lines the same way, tying them off to lower eyescrews. Then, when I was ready to hang laundry, I untied that lower knot, dropped the lines, and hung the clothes. I had to make allowances for the change in position that was going to come when I raised the lines back up to the tallest height, and I didn’t always get it quite right. There was a learning curve. With the clothing (mostly towels, to be honest) hanging from the lines, I pulled the cords tight, and re-tied them to the lower eye screws.
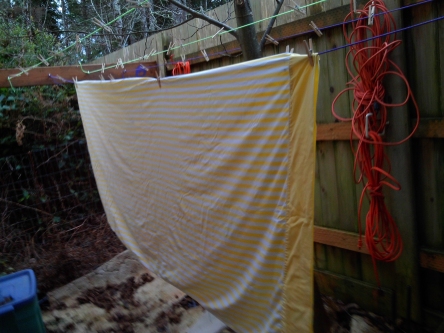
My clothesline was not perfect. I wasn’t always able to put the eye screws where I would have liked, and in a couple of places I just messed up. I was able to hang my clothes up to dry, though, safely out of the rain. I still had to weave my way through a jungle of damp laundry, but at least I didn’t decapitate anybody with low-hanging clotheslines.
Even inside the garage, the air was damp. It took two days for my laundry to dry. It smelled almost as fresh as the laundry I hung outside. It had the crisp texture I loved, too, and it didn’t use any electricity, so I was happy. Having another clothesline, inside the garage this time, gave me options other than borrowing my daughter’s dryer or going to a laundromat–and I have always liked to have options.

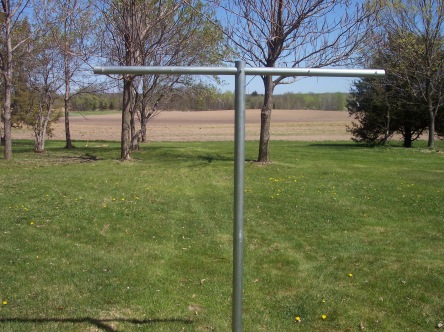


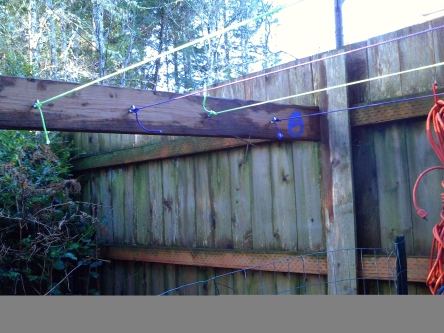
 Because my son-in-law is quite tall, I attached the boards higher than I would want for myself. He would be able to hang blankets and other large items, without worrying about them dragging on the ground. That clothesline was the easy one.